At a glance
- Confirm the bed position before centering a panel pattern or a feature zone.
- Check the headboard, bedside furniture, lights and sockets on one measured elevation.
- Keep fixed services visible in the study. An attractive composition does not establish safe electrical work or furniture access.
Establish the sleeping layout before the wall pattern
Start with the actual bed frame dimensions. A mattress size does not include a wide headboard, a projecting base or a storage drawer. Add the bedside tables and any chair or desk. Show wardrobe doors and the bedroom entrance in the plan.
Choose the bed position for everyday use. Check getting into bed, opening storage and reaching the window. A decorative feature should follow that decision. Moving the bed only to center a panel grid can create a less useful room elsewhere.
Next, draw the wall behind the bed. Mark the headboard height and the visible space above it. A lower frame can disappear behind a tall headboard, while a strong rail can meet the headboard at an awkward point. Inspect those lines before discussing color.
Move the bed and compare three compositions
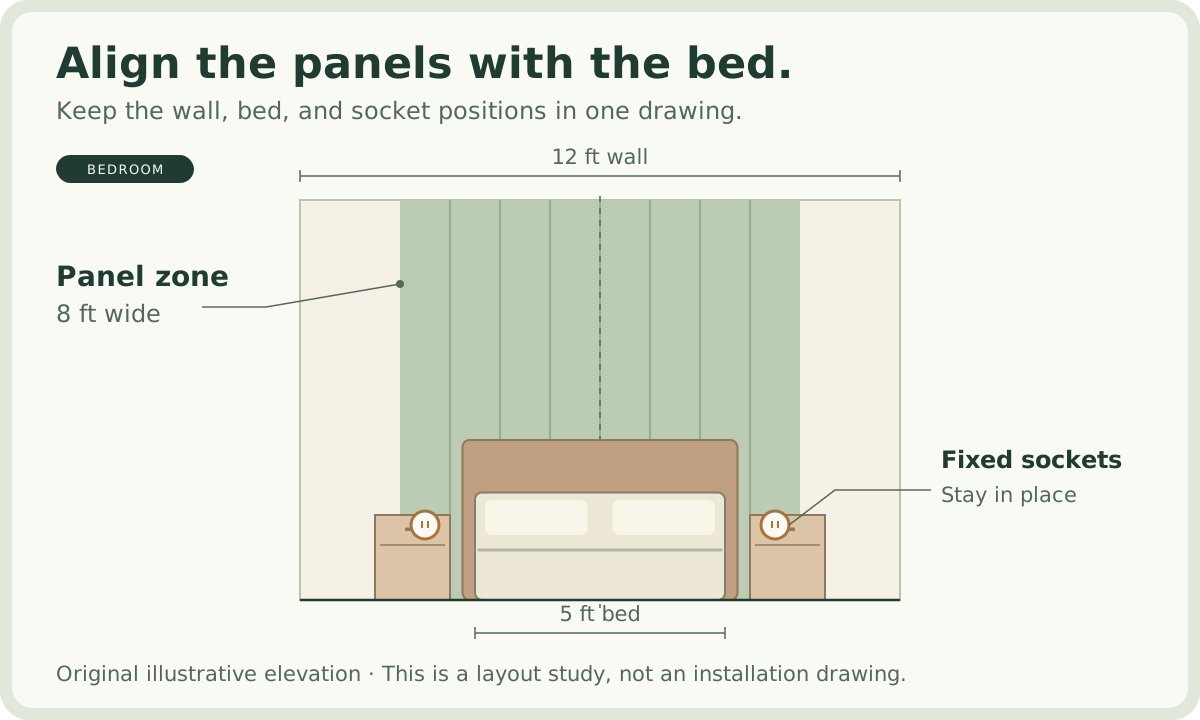
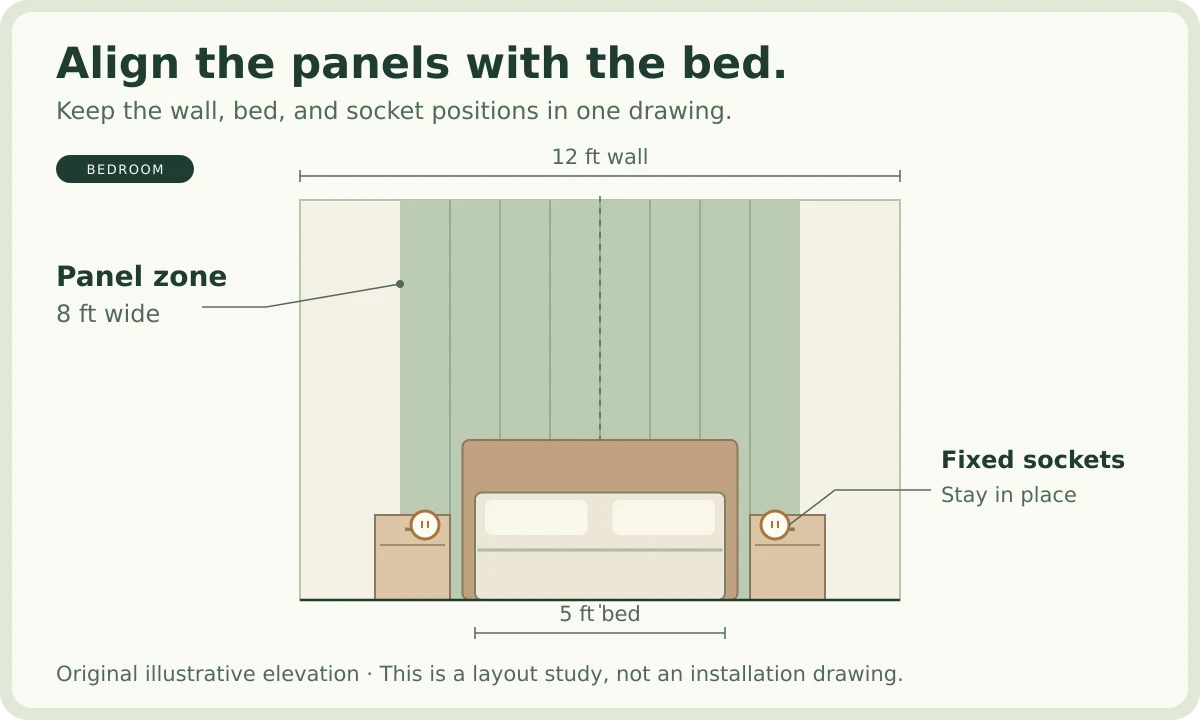
The diagram uses a 12 × 8 ft wall and a 5 ft wide bed. Move the bed center between 5 and 7 ft from the left edge. At the starting position, the bed center is 6 ft, which is also the wall center. The example sockets remain fixed at 2.5 and 9.5 ft.
Compare the room-centered grid, an 8 ft wide feature centered on the bed, and a 4 ft high lower band. The grid keeps its relationship with the wall. The bed-centered feature follows the furniture. The lower band keeps one continuous horizontal line.
Read the bed offset and alignment feedback while changing the position. The exercise shows a composition tradeoff. Socket locations, band height and bed size are illustrative. They do not define installation clearances or electrical compliance.
Align the wall with the bed
Keep the room and socket positions fixed. Move the furniture, then compare which pattern follows the bed and which stays with the wall.
Centered on the wall
The grid stays centered on the wall. Moving the bed changes its relationship with the frames.
Socket markers remain visible over the furniture drawing. Check real plug, drawer and switch access in the room.All dimensions are illustrative, including the socket and band heights. This exercise does not establish installation clearances, electrical compliance or a wiring plan. Changes reset on reload.
Choose what should align with the bed
A room-centered grid can suit a bed that will stay near the center. Check whether its vertical divisions frame the headboard or disappear behind it. If the bed moves later, the pattern remains tied to the wall, so the relationship changes.
A feature centered on the bed can make an offset arrangement intentional. Check the two exposed ends and their distance from corners or openings. Decide whether a future bed size will still fit the feature. Do not assume a larger bed can be substituted without another review.
A lower band can connect the entire elevation. Set its proposed height against the headboard and nearby furniture. Compare the band in the full room, including the window sill and wardrobe. A repeated height is a design choice; it is not a requirement to match every unrelated edge.
| Composition | What stays consistent | Question to resolve |
|---|---|---|
| Wall-centered frames | The pattern follows the wall center | Will the bed remain in this position? |
| Bed-centered feature | The feature follows the chosen bed center | Where do its two ends meet the rest of the wall? |
| Continuous lower band | One horizontal top edge | How does that edge meet the headboard and furniture? |
Coordinate sockets, lights and bedside furniture
Draw sockets and switches as fixed points until a qualified person confirms a proposed change. Add bedside furniture at its actual height and width. Check whether you can reach the switch and connect a plug without moving a heavy item. Include the space needed for the plug and cable.
Record wall lights separately from decorative lines. A light may be useful for reading but uncomfortable when viewed from the pillow. Test the proposed position in the room using the fitting information and the intended bed. A flat elevation cannot show every viewing angle.
Electrical Safety First warns about concealed cables when drilling and advises using competent electrical help. A visible socket is not a complete map of hidden services. Resolve electrical changes before closing the surface or fitting decorative panels over it.
- Show socket and switch positions from a reference corner and the floor.
- Check bedside drawer use, plugs and lamp leads together.
- Keep required electrical access available after the finish is installed.
- Record unresolved service questions on the elevation.
Choose a finish for the way the bedroom is used
Review a physical finish sample beside the headboard fabric and bedding. Look at it in morning light and under the lights you use at night. A deeply textured surface can look different under a wall light than under an even ceiling light.
Check cleaning access behind the bed and around bedside tables. Ask the supplier how the finish handles marks, how it should be cleaned and how a damaged section can be repaired. If the headboard touches the wall, check the contact area rather than assuming the surface will remain unmarked.
Consider future changes. A broad feature can accept different bedding more easily than a very specific color arrangement. Keep the drawing with the bed and furniture dimensions so a replacement item can be checked before purchase. Finish the pattern study before requesting a product-specific quotation.
Check the bedroom in plan as well as elevation
Use the elevation to choose the wall composition. Then return to the room plan to check the bed depth, wardrobe access and routes. A balanced headboard wall can still sit in a bedroom with poorly placed furniture. Review the two drawings as one decision.
In HouseSpace, enter measured room and furniture information or open the furnished sample. Move one item, inspect it in plan, then compare the same arrangement in 3D. Sign-in is required. The sample dimensions describe a teaching project, not your bedroom.
HouseSpace does not create a panel cutting list or a socket installation design. Keep the selected wall composition as a separate elevation. Give that drawing, the actual furniture sizes and the remaining questions to the supplier or installer before committing to the work.
Questions before you start
- Should bedroom paneling be centered on the wall or the bed?
- Choose the reference that supports the intended layout. A wall-centered grid stays fixed if the bed moves. A bed-centered feature follows the selected furniture position. Compare both before choosing.
- How high should paneling be behind a bed?
- Compare the proposed top edge with the actual headboard, bedside furniture and room features. The 4 ft band in the diagram is an example, not a required or recommended height for every bedroom.
- Can I use paneling instead of a headboard?
- Treat these as separate product decisions. Check comfort, surface contact, cleaning and the bed manufacturer instructions. A decorative wall finish does not automatically perform as an upholstered or protective headboard.
- Can I cover a socket with bedroom wall panels?
- Keep required access available and resolve changes with a competent electrician. Do not use the diagram as permission to conceal services or drill near cables.
- Does the interactive bedroom diagram save my design?
- It is a public teaching exercise with illustrative dimensions. Use it to compare alignment, then record your actual room separately. Sign in to the HouseSpace studio to work with editable rooms and furniture.
Sources and review
Prepared by HouseSpace from original illustrative wall elevations, manufacturer guidance and the current HouseSpace planning workflow; reviewed 18 October 2026. This is product guidance, not an architectural certification or an independent software review.